OIDC configuration for Azure
Introduction
Genie now supports Single Sign-On (SSO) through the OpenID Connect (OIDC) protocol, enabling secure and seamless user authentication across your organization. This integration allows users to log in to Genie using their enterprise credentials, eliminating the need for separate usernames and passwords.
While this guide provides step-by-step instructions using Microsoft Azure Active Directory (Azure AD) as an example, Genie can be configured with any identity provider that supports the OpenID Connect standards.
Create a Client Application in Azure Portal
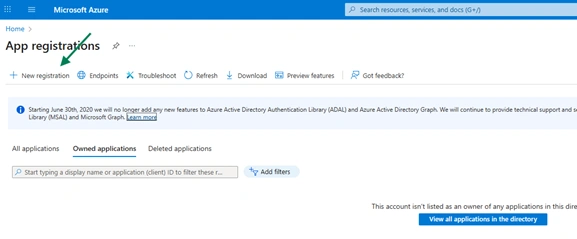
Access Azure Portal
- Sign in to https://portal.azure.com
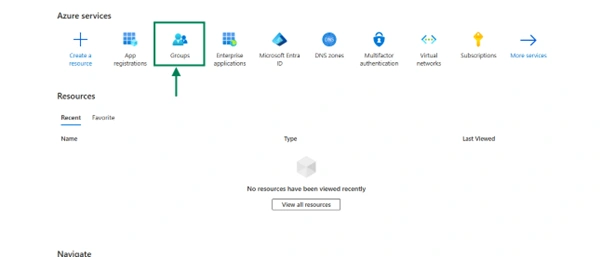
- Navigate to Azure Active Directory → App registrations → New registration
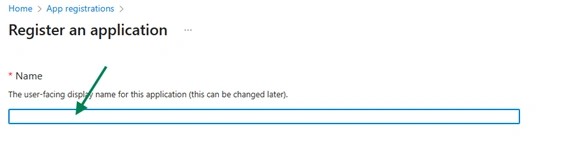
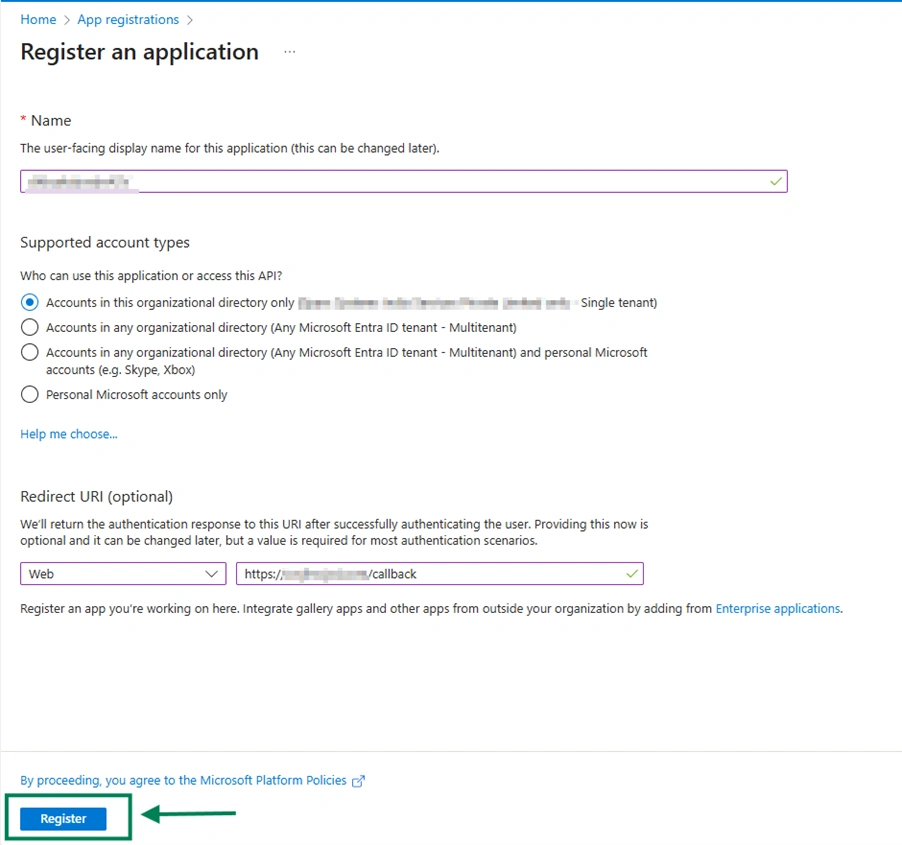
Register the Application
- Enter a friendly Name (e.g., Genie )
- Set Supported account types (usually “Accounts in this organizational directory only”)

- Under the Redirect URI select the platform as Web
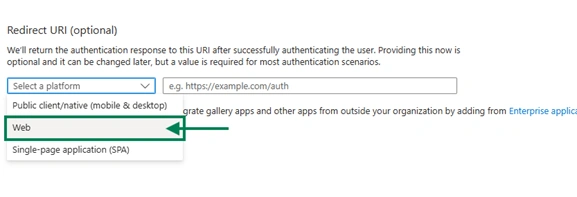
- Enter Redirect URI (callback URL) of Genie, e.g.,
https://your-genie-url/callback) - Click Register
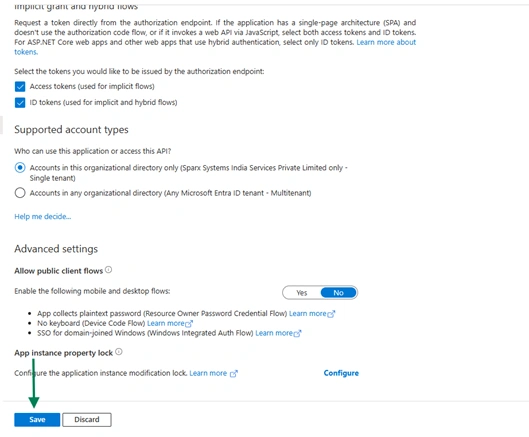
Configure Authentication
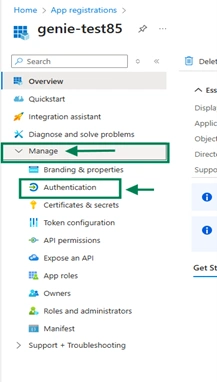
- From the left navigation panel, go to Manage → Authentication.
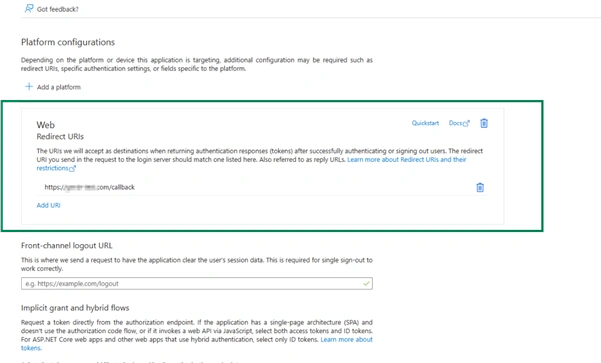
2.Ensure that the Redirect URI(s) are configured correctly.
3.Enable both ID tokens and Access tokens under the Implicit grant and hybrid flows section.
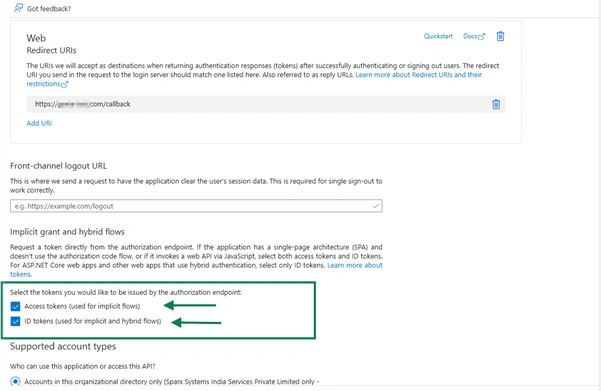
4.Click Save to apply the changes.
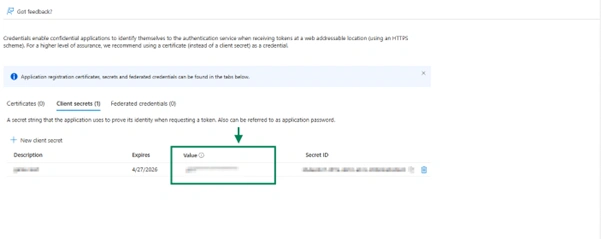
Create secret value
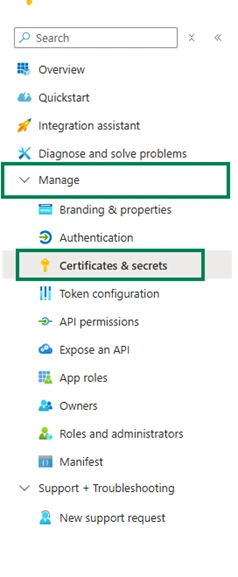
- From the left navigation panel, open Certificates & Secrets.
2.Click New client secret and create a new secret.
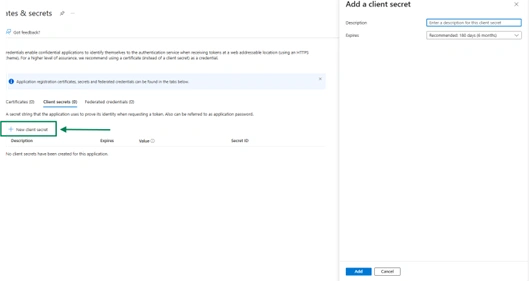
Copy and securely store the Secret Value immediately after creation.
Note: The client secret value is displayed only once after it is created. Make sure to save it securely before leaving the page.
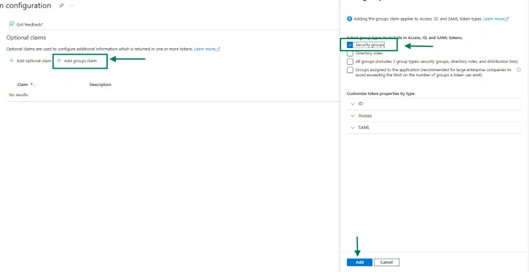
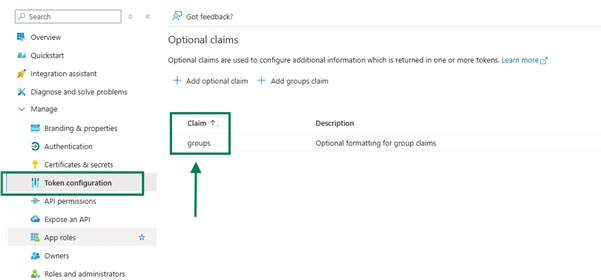
Create group claims
- From the left panel, select Token Configuration.
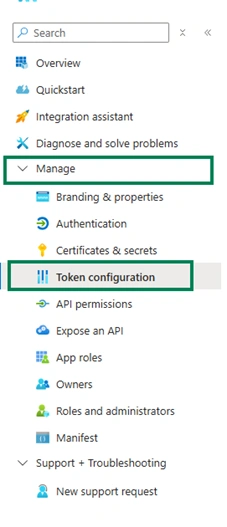
2.Click Add group claim.
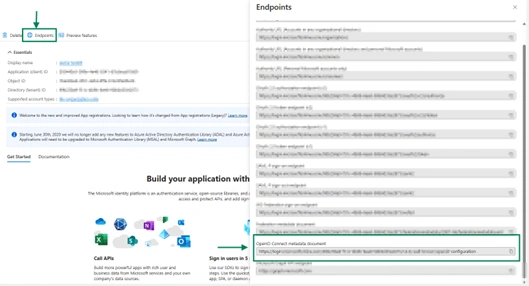
Get Metadata URL
- In the App Overview section, click Endpoints from the top menu.
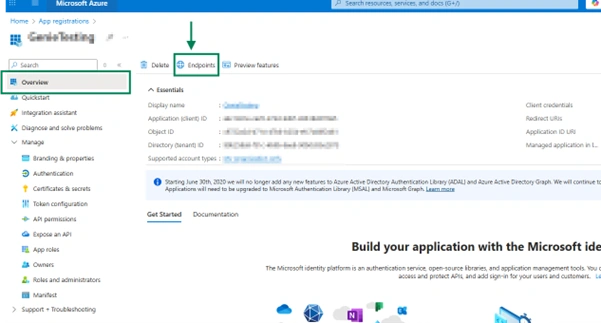
- Scroll down and copy the value of OpenID Connect metadata document.
- This URL will be used as the Metadata URL in Genie configuration.
Configure OIDC in Genie
Prerequisite
| Genie | Azure |
|---|---|
| Metadata URL | OpenID Connect metadata document |
| Client ID | Application (Client) ID |
| Client secret | Secret value |
Navigation
- Log in to Genie as an Administrator and go to Configuration → SSO Configuration (from the left-bottom panel).

Enable SSO
- Toggle Enable SSO Login to activate Single Sign-On.

Connection Details
Enter the Metadata URL, Client ID and Client Secret from your Azure application.

Scopes and Permissions
- Specify the permissions (scopes) that the application requests from the Identity Provider (IdP).
These scopes determine the user information accessible to Genie.
Include the following default scopes:

Attribute Mapping
- This section maps the claims (attributes) received from the IdP’s token to the corresponding user fields in Genie.
| Attribute Type | Requirement | Description | Default Claim |
|---|---|---|---|
| Unique ID Attribute | Required | The IdP claim that provides a stable, immutable identifier for the user. This is critical for linking the IdP user to their Genie account. | sub |
| Username Attribute | Required | The IdP claim used as the displayable username or login ID within the application. | name or email |
| First Name Attribute | Optional | The IdP claim for the user’s First name. | given_name |
| Last Name Attribute | Optional | The IdP claim for the user’s last name. | family_name |
Group attribute Mapping
This optional section allows mapping of a user’s groups from the IdP to roles within Genie.
Important: This mapping must be either fully configured or left blank.
Both fields (Groups Attribute Name and Mapped Group Names) must be completed or left empty.
- Groups Attribute Name: The name of the IdP claim that contains the list of user groups.
In Azure, this can be found under Token Configuration and is typically set as groups
- Mapped Group Names: A list of specific group names (Object IDs) from your IdP that Genie should recognize.
(Example: Enter your groups Object Id)
- In the Azure Portal, go to Home → Groups → All Groups
- Search for the required group name.
- Copy the Object ID of the group (as shown in the image below).
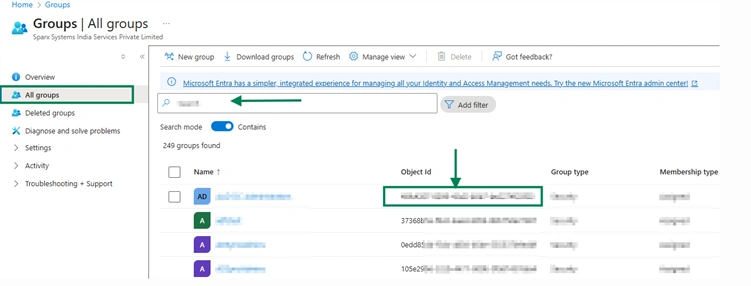
4.In Genie, paste each Object ID into the Mapped Group Names field.
If multiple groups need to be added, enter each Object ID on a new line by pressing Enter.
Subscribe to our Newsletter
Get product updates, feature tips, and integration insights in your inbox.


