User Guide: Adding and Configuring MCP Tools
Overview
This guide explains the process of adding, configuring, and enabling MCP (Model Context Protocol) tools within the platform. Each MCP tool requires specific configuration details, followed by loading and selecting the tool for use in Genie Chat.
Steps to Add an MCP Tool
1. Navigate to Add Tools (MCP)
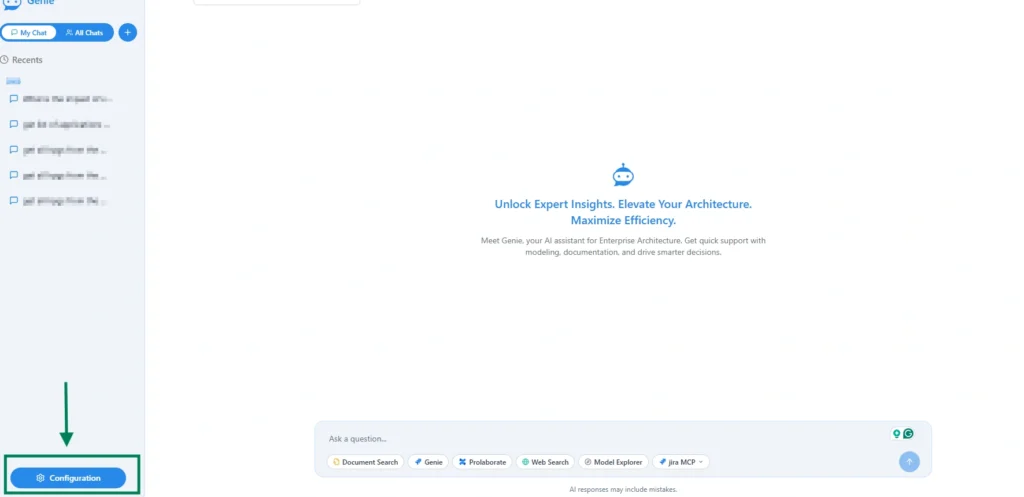
- From the Genie Chat page, click the Configuration button.
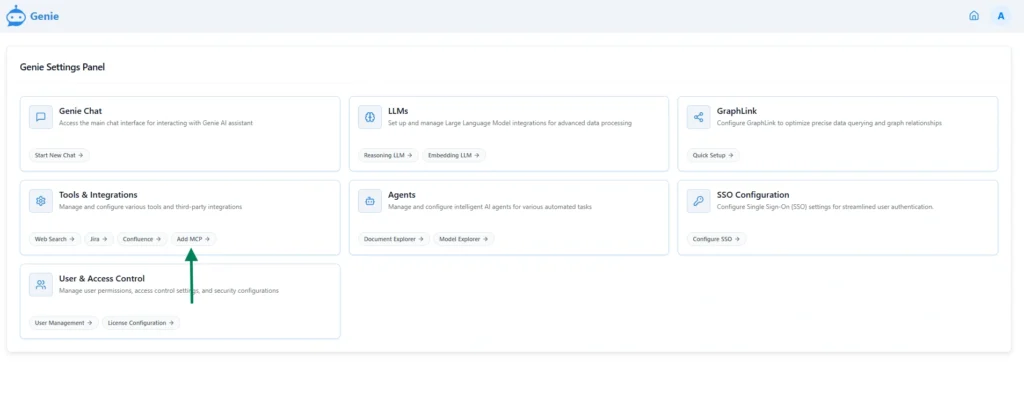
- From the Tools & Integration section, Click the Add Tool option.
- On the Add Tool page, click the Add Tool button located at the top right of the page.
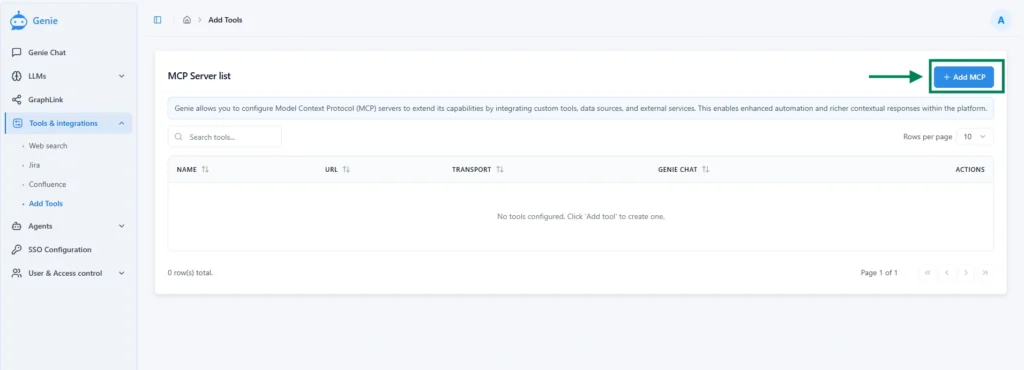
- This opens the MCP tool configuration form.
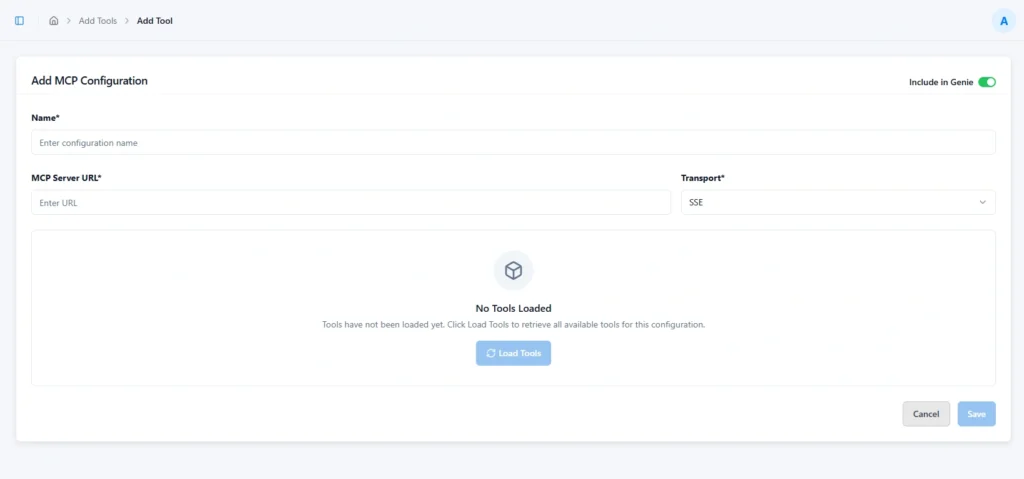
2. Provide Tool Configuration Details
Fill in the required properties for the MCP tool:
Name:
- Enter the name of the MCP tool.
MCP Server URL:
- Provide the complete URL of the server that supports the Model Context Protocol.
Transport:
- Select the transport type either “sse” or “streamable_http” with drop down, which defines the communication protocol for establishing and maintaining the data stream.
- This determines how the client receives continuous information from the server.
Include in Genie Chat:
- Enable the toggle if the agent icon should appear in Genie Chat.
3. Load Tools from the MCP
- After entering the configuration details, click the Load Tools button
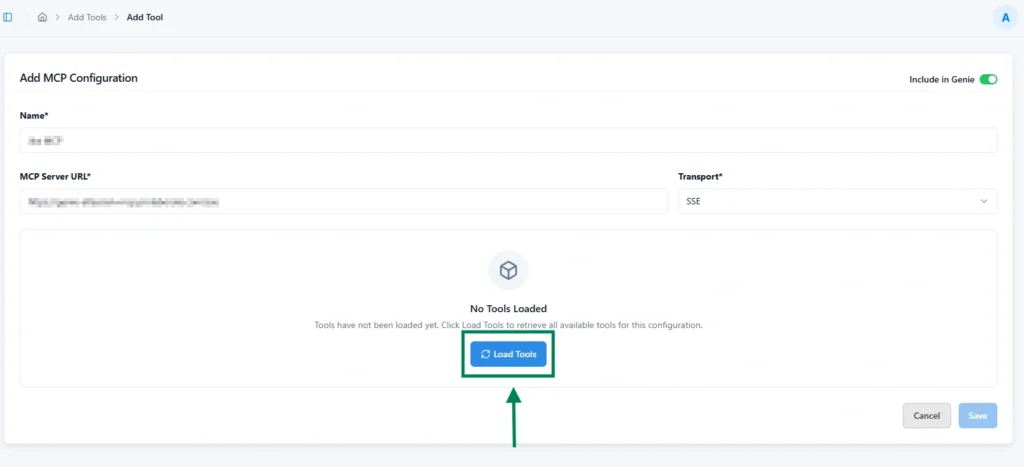
- The system will list all tools available from the configured MCP in the “Select Tools” section.
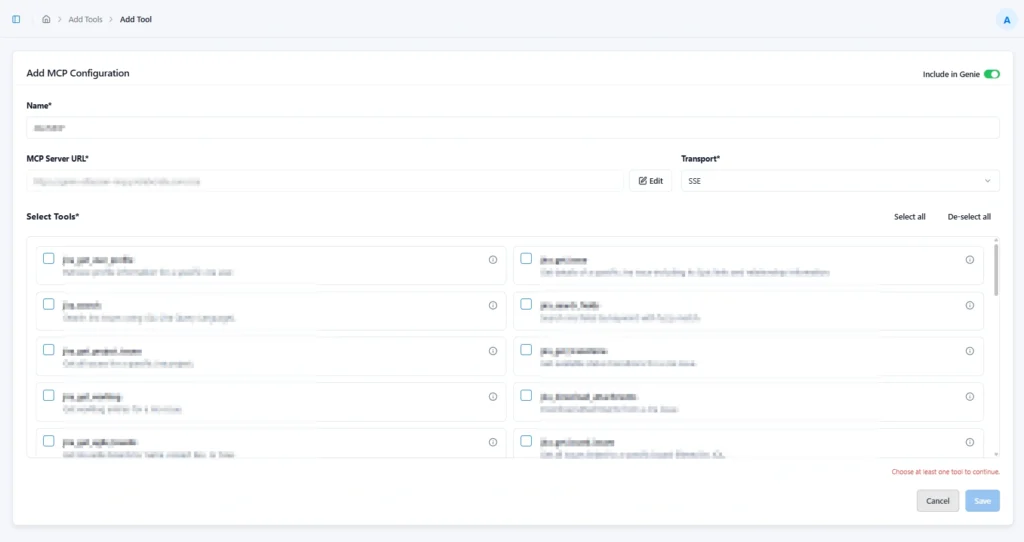
- From the list of available tools, select the ones required for the configuration.
4. Save Configuration
- Click the Save button to finalize and store the MCP tool configuration.
Subscribe to our Newsletter
Get product updates, feature tips, and integration insights in your inbox.

