Using EA GraphLink as an MCP Server in Microsoft Copilot Studio
Overview
EA GraphLink is exposed as a Model Context Protocol MCP server, enabling Sparx Systems Enterprise Architect architecture data to be securely consumed by external AI platforms. By implementing MCP, EA GraphLink allows AI tools to query, interpret, and reason over authoritative architecture models stored in Sparx Systems Enterprise Architect without requiring direct access to the underlying repositories.
This document describes how EA GraphLink can be integrated with Microsoft Copilot Studio using MCP.
Step-by-Step Configuration Guide
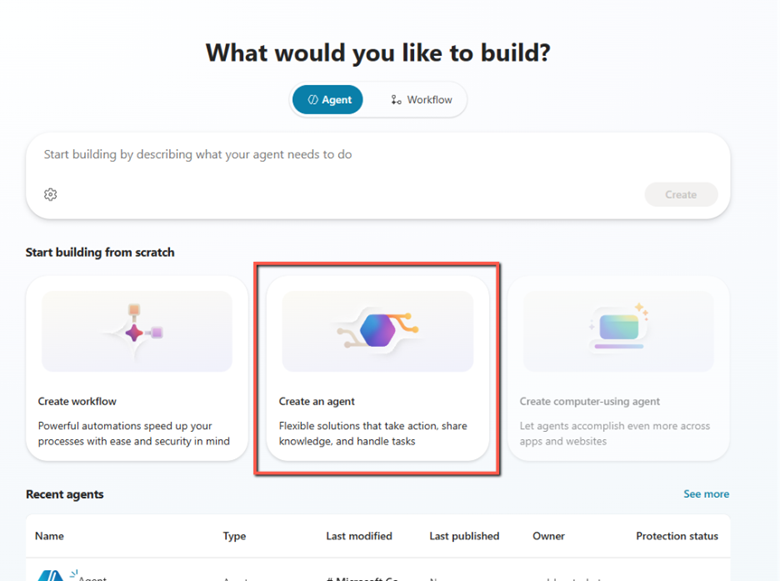
Access Microsoft Copilot Studio
- Sign in to Microsoft Copilot Studio.
- On the Home landing page, select Create an agent to begin creating a new Copilot agent.
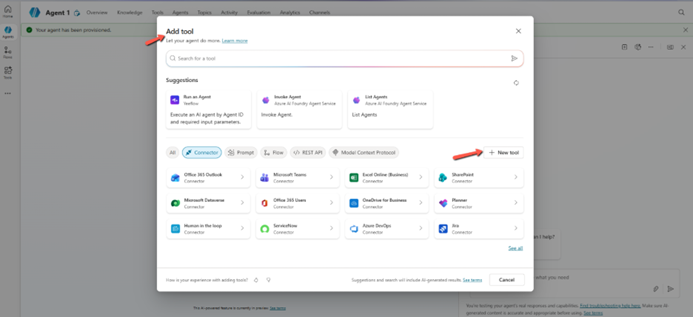
Add a Tool to the Agent
- In the Agent creation screen, navigate to the Tools tab.
- Select Add a tool.
- In the Add tool dialog, choose New tool.
Select Model Context Protocol (MCP)
- In the tool type selection screen, choose Model Context Protocol.
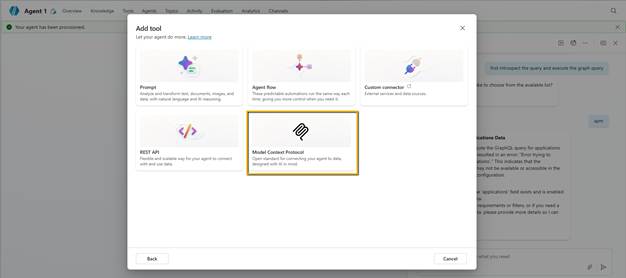
- This option enables Copilot Studio to connect to an externally hosted MCP-compliant server.
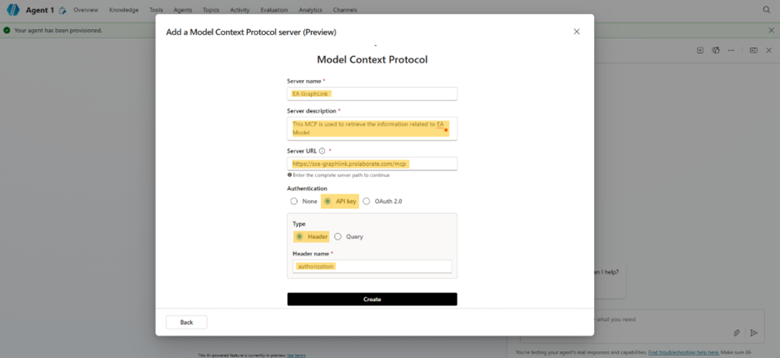
Configure MCP Server Details
In the Add MCP Server configuration form, provide the following information:
| Name | Description |
| Server Name | Enter a meaningful name to identify your MCP server |
| Server Description | Provide a brief description of the MCP server’s purpose |
| Server URL | Enter the MCP server endpoint URL. This URL can be obtained from the EA GraphLink application |
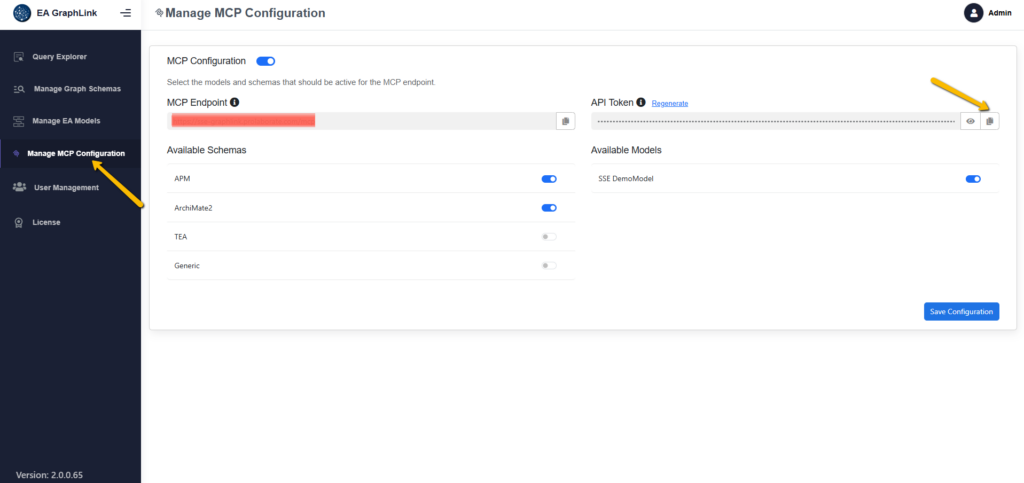
To Get the MCP Endpoint
GraphLink App → Manage MCP Configuration → MCP Endpoint
For more details refer How to Enable the EA GraphLink MCP Server

Configure Authentication
The EA GraphLink MCP server uses JWT Bearer Token–based authentication.
- Select API Key as the authentication type.
- Choose Header as the key location.
- Set the Header Name to: Authorization
- Proceed by selecting Create.
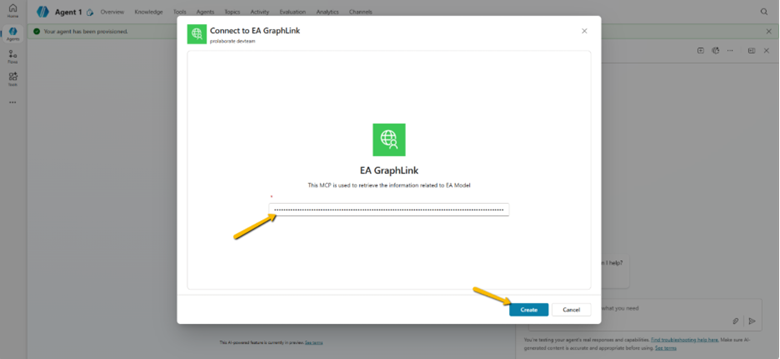
Create a New Connection
When prompted to create a new connection:
- Enter the Authorization header value using the following format:
Bearer <YOUR_API_TOKEN>
- The API token can be retrieved from:
GraphLink App → Manage MCP Configuration → API Token
Bearer eyJhbGciOiJIUzI1…………………………….wW9-Alj78zIA2LFfdxoTWLJUhlkbyhH5_tXc
- After entering the value, select Create.
Finalize MCP Configuration
- Select Add and configure to complete the setup.
- Copilot Studio will retrieve and display the list of available MCP tools.
- Successful retrieval of tools confirms that the EA GraphLink MCP server is connected and configured correctly.
Validation and Usage
- Once connected, the MCP tools become available to the Copilot agent.
- You can begin testing the agent by submitting prompts related to the Sparx Systems Enterprise Architect repository.
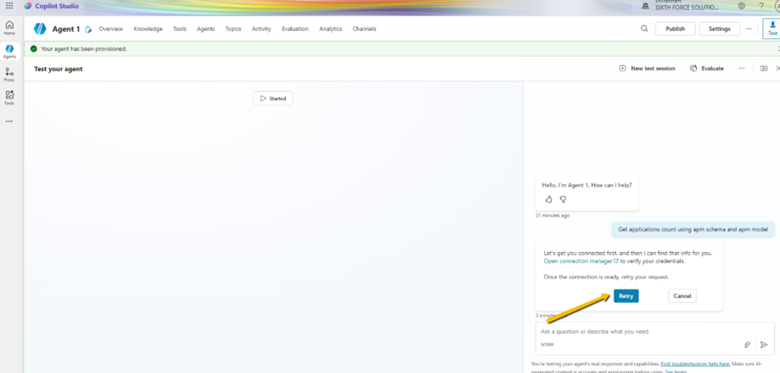
- During the initial prompt execution, Copilot Studio may prompt you to explicitly authorize or connect with the tool.
- If you get any connection manager prompt, follow the below mentioned steps.
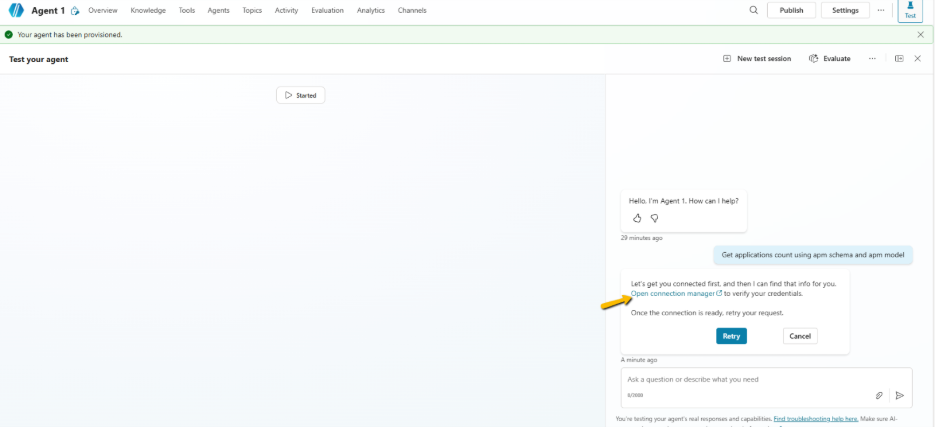
- Click on the “Open connection manager” in the image above
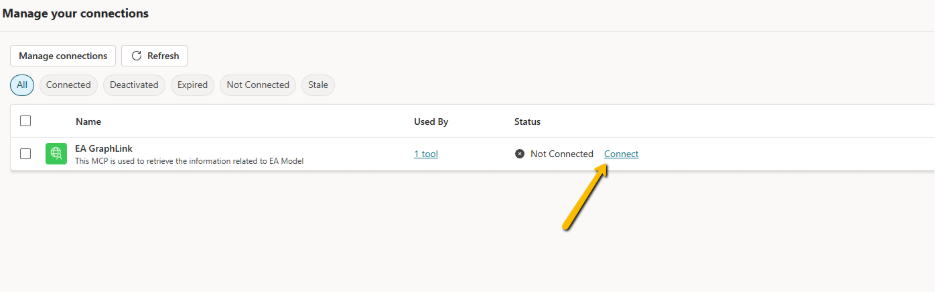
- Form list, select Connect
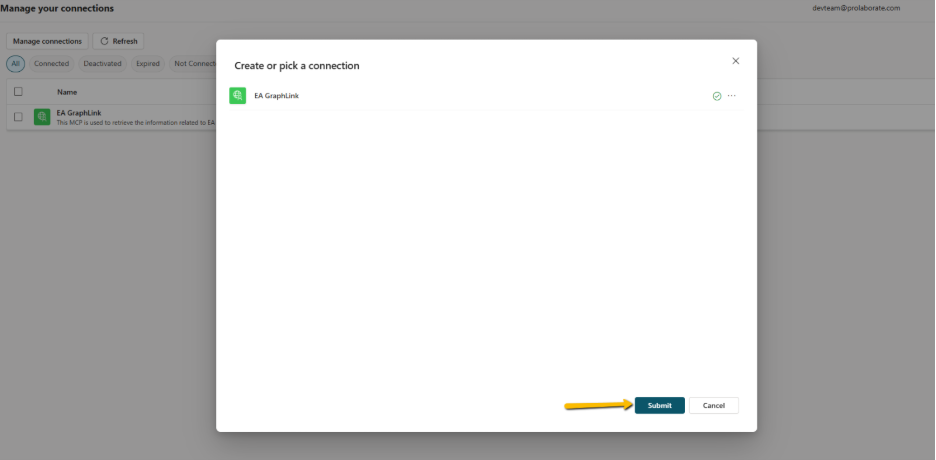
- And click on the Submit button and it will show as Connected as in the image below.
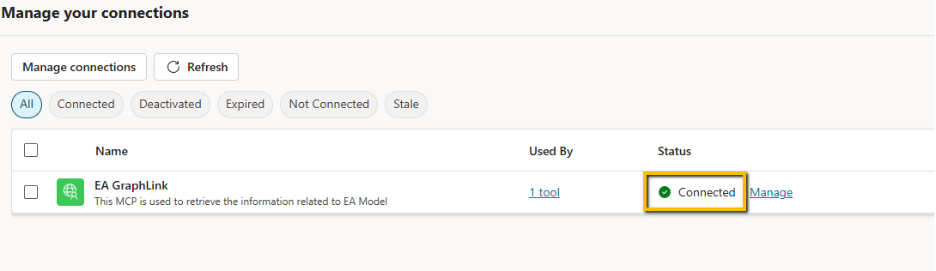
- When you retry, the Graph MCP will work as expected.
Conclusion
After completing these steps, the Graph-based MCP server is fully integrated with Microsoft Copilot Studio, enabling secure and dynamic access to graph data through conversational interactions.
Subscribe to our Newsletter
Get product updates, feature tips, and integration insights in your inbox.


